Layer change Event
Layer change Event: This video contains how to shift from one layer to another using custom visualization..
Note: This document uses to apply functionality of change layers on user click, Form the below steps user can shift from one layer to another layer using event with the use of custom visualization.
- Create dashboard.
- After creating dashboard, create multiple layers from Top-left corner, click on Add New Layer button, as shown in figure below:
Note: If you’re not able to see the layer button from top-right corner then disable the Hide Layers Checkbox, for that go to Dashboard Settings & open Hide Layers and Tabs as follows:
- Go to layer 1 & Click on Custom visualization widget icon from the right vertical menu bar, as shown in figure below:
- Go to HTML tab of the custom visualization widget to apply the layer-change-event code, as shown below:
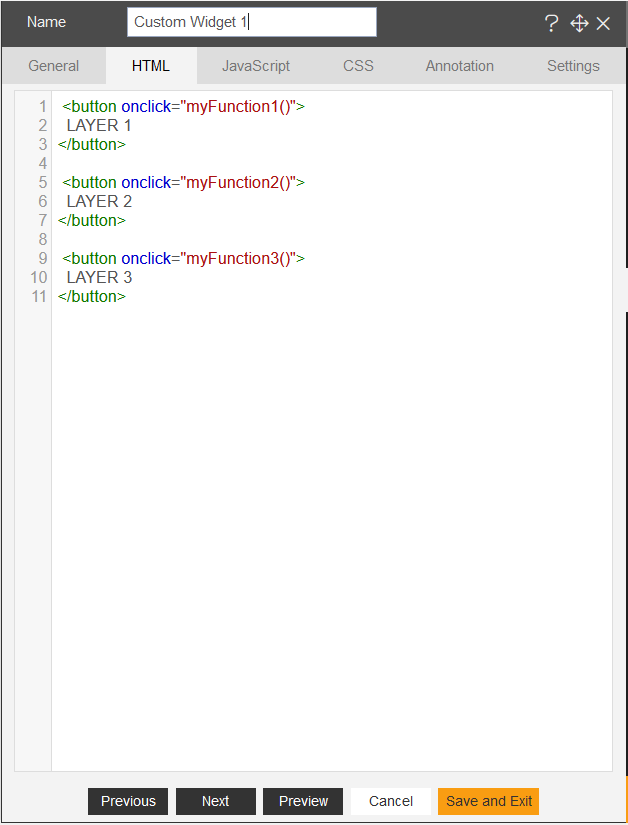
- Create buttons for multiple layers, as shown in figure below.

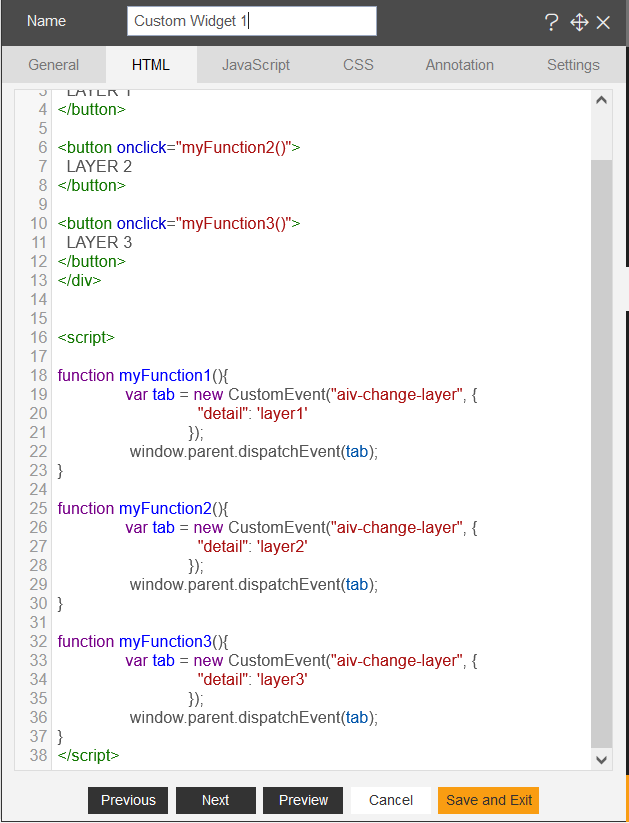
- Now apply code for Layer-change below the buttons using function, as shown in figure below:

Example Code:
function myFunction1(){
var tab = new CustomEvent("OPNBI-change-layer", {
"detail": 'layer1'
});
window.parent.dispatchEvent(tab);
}
- Now click on Save and exit button and go to preview screen to see the output, as shown in figure below:
- Click on Layer2 button, it will reach to the Layer 2 in dashboard.
Example Code:
<div>
<button onclick="myFunction1()">
LAYER 1
</button>

<button onclick="myFunction2()">
LAYER 2
</button>

<button onclick="myFunction3()">
LAYER 3
</button>
</div>

<script>

function myFunction1(){
var tab = new CustomEvent("OPNBI-change-layer", {
"detail": 'layer1'
});
window.parent.dispatchEvent(tab);
}

function myFunction2(){
var tab = new CustomEvent("OPNBI-change-layer", {
"detail": 'layer2'
});
window.parent.dispatchEvent(tab);
}

function myFunction3(){
var tab = new CustomEvent("OPNBI-change-layer", {
"detail": 'layer3'
});
window.parent.dispatchEvent(tab);
}
</script>
</div>